
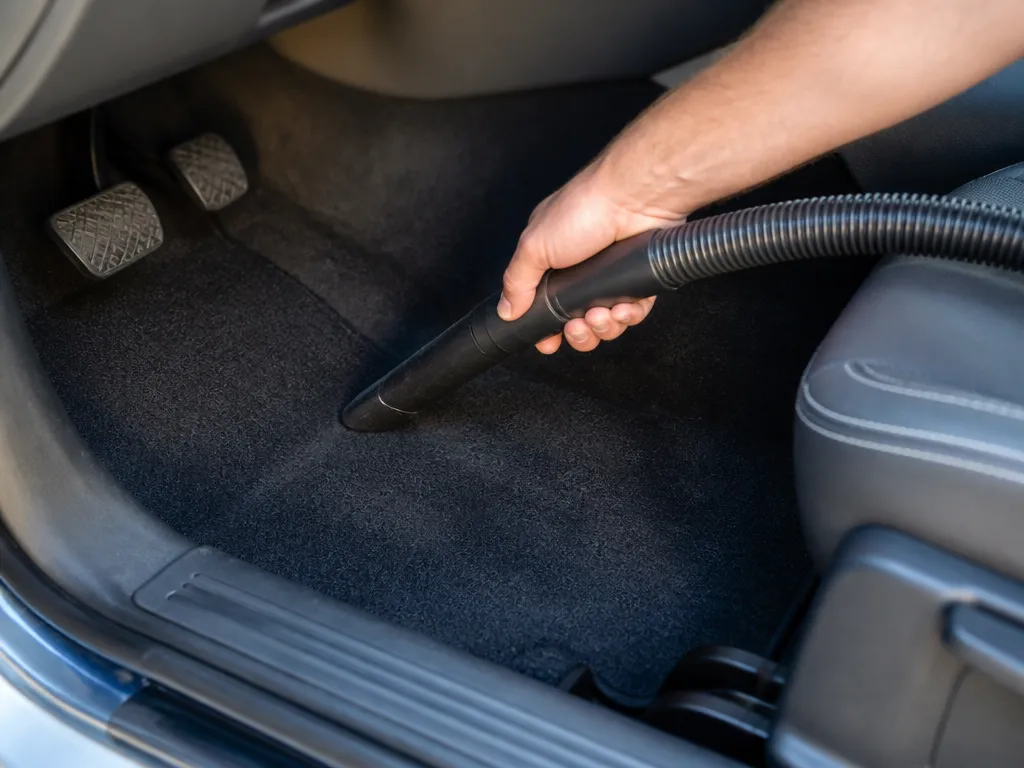
You pull the floor mat and see that gray stain spreading across the driver-side carpet, and the smell is worse after it rains. Over-scrubbing makes it look patchy, and soaking the carpet can leave days of musty odor. This guide walks you through cleaning car carpet step by step, from color testing to drying, so it comes out clean without ruining the fibers.
Test for colorfastness first, especially near dyed carpet edges and any leather-adjacent areas. Use fiber-safe agitation and low-saturation extraction so dirt lifts instead of driving deeper. You will get a tools-and-products list with budget tiers, stain-by-stain treatments with dwell times, plus a drying and odor plan.
How to clean car carpet: vacuum loose dirt, then patch-test cleaner on a hidden spot. Pretreat stains, agitate gently, and extract with a carpet cleaner using short passes. Blot with clean towels until minimal color transfers. Rinse only if the product directs it, then dry with airflow for 6 to 24 hours, depending on humidity.
How To Clean Car Carpet (Scope &Amp;amp;amp; Safety)
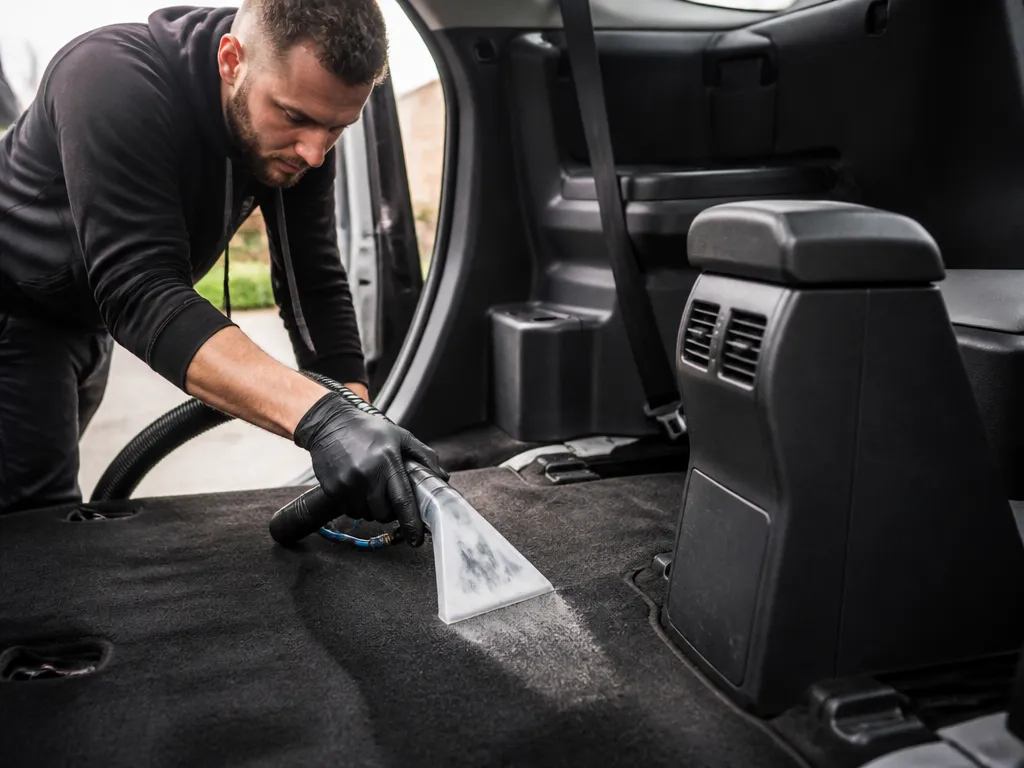
Car interior cleaning has a few landmines, and the wrong cleaner can wreck dye, backing materials, or adjacent trim. This guide is built for typical home cleaning of floor carpeting, rubber or fabric mats, and trunk or liner carpet without turning the job into a reupholstery project.
Before any product touches the fibers, protect the surfaces around the carpet and understand what you are actually cleaning. Carpet color usually comes from dye on the face yarn, but stains soak into the fibers and travel into the padding and backing, which can change what “clean” really means once it dries.
Test Spots, Colorfastness, And Dye Control
Carpet dye can fade, bleed, or streak when exposed to strong detergents or high-heat water. Test every cleaner on an out of sight spot (under a seat edge or deep in the trunk), wait until it is dry, then check for color transfer onto a white towel.
For example, a “lift and brighten” spray may clean surface grime fast, but it can also pull loose dye when you agitate. That is why you test first, then work in small sections and blot, instead of saturating and scrubbing the whole floor at once.
Rule of thumb: If the test area changes color or leaves dye on a towel, switch to a gentler product and repeat the test. Bleeding dye is a pain to fix because it can spread beyond the original spot.
Avoid Leather-adjacent Damage And Chemical Hazards
Many interiors have leatherette, genuine leather, or vinyl near the carpet edges, especially at seat bolsters and along console seams. Keep carpet cleaners off leather and vinyl seams, because overspray or runoff can stain, soften, or dull trim surfaces.
Avoid bleach and harsh solvents on automotive carpet. Bleach can attack dye and weaken fibers, and solvents can damage synthetic yarn coatings while also leaving a lingering odor that is hard to eliminate.
Moisture Control: Padding, Rust, And Drying
Over-saturation is the quickest way to turn a cleaning job into a future odor problem. Carpet backing and padding hold water, and trapped moisture can lead to mildew smells, corrosion on nearby metal, and long dry times that make stains reappear.
In practice, use enough cleaner to clean, then pull moisture out with a shop vacuum that has a wet pickup or a carpet extractor. After cleaning, keep windows cracked or run a fan to move air, and confirm the carpet is fully dry before closing up the vehicle or reinstalling seats and mats.
| Area you’re cleaning | Extra caution |
|---|---|
| Floor carpeting | Padding traps moisture, so use controlled amounts and fast extraction |
| Mats (rubber or fabric) | Check for dye transfer on fabric mats, and rinse thoroughly to remove residue |
| Trunk liner or cargo carpet | Watch for water near weather seals and drains, and dry thoroughly before reinstall |
Car Carpet Tools And Cleaners List
Clean car carpet well with four essentials: strong vacuum suction, a soft brush to loosen grit, a blotting setup for extraction-style removal, and pH-balanced cleaner meant for automotive or household carpets. Matching the right fiber tools to the right chemical keeps the pile from matting and helps finishes like rubber mats and dyed trims avoid streaking.
| Item | Amount/Specification | Notes |
|---|---|---|
| Vacuum | 1 unit with strong suction | Cordless is fine for quick light jobs; a corded shop-vac helps when you are pulling sand from deep pile. |
| Soft brush | 1 nylon detailing brush (soft to medium) | Soft bristles lift embedded dirt without abrading most factory carpets. |
| Extraction or blotting setup | Option A: handheld spot extractor (1) + hose, Option B: clean towels (6-10) + spray bottle | Extraction speeds drying control; towel blotting works when you cannot draw much water out. |
| Microfiber towels | 6-12 towels | Microfiber grips soil better than cotton and reduces lint transfer. |
| Carpet-safe shampoo | 1 bottle, pH-balanced | Pick products labeled safe for carpet or upholstery, avoid harsh alkaline or solvent-heavy mixes. |
| Enzyme cleaner (organics) | 1 bottle if there are food, urine, or body-fluid odors | Enzymes break down the so odors do not rebound after drying. |
| Degreaser (spot only) | 1 small bottle, carpet/upholstery safe | Use sparingly for greasy footprints, then follow with carpet shampoo to prevent residue. |
| Odor/disinfectant | 1 spray product, water-based carpet-safe | Choose formulations meant for fabric. Avoid fogging the whole cabin to prevent oversaturation. |
| Fiber accessories | 1 nylon brush + 1 stiff-to-soft bristle option | Stiffer bristles work on short, durable mats; soft-only is safer for dyed factory carpet. |
Budget-tier Tool And Cleaner Setups
Shop-vac plus upholstery carpet cleaner is the most cost-effective route when stains are light to moderate and you can towel-blot thoroughly. A typical approach is vacuuming, agitating with a soft brush, then spraying cleaner lightly and extracting by blotting (towels) or using the shop-vac to pull out as much moisture as possible.
Extractor rental is worth the money when the carpet is heavily soiled across larger areas (back seat, full floor pans) because you can remove more water and reduce the “wavy dry” look. Extractor rental setups usually include the right hose tips for upholstery, but the key is matching the cleaner to the machine so you do not leave detergent residue.
Cleaner Types And Compatibility Notes
P&H-balanced carpet shampoo is the baseline choice for routine cleaning and most spills. Enzyme cleaners matter when the problem is organic contamination, since they target odor-causing compounds rather than masking smell.
Degreaser is a spot tool only. Degreasing agents can leave a slippery residue or lighten dye if you flood the area, so apply to the stain area, work it in gently with a brush, then clean again with carpet shampoo to rinse the residue out.
Odor And Disinfectant Choices
Water-based, carpet-safe odor products are the safest bet for use after cleaning, especially in cabins like sedans and crossovers where ventilation is limited during weekends. Carpet-safe disinfectants should be used like a spot treatment or a light targeted mist, then allowed to fully dry.
Pro tip: Keep a separate towel for “clean water” blotting. That one step prevents detergent from building up in the pile and turning into a sticky re-soil zone.
Patch Test Spots And Colorfast Check
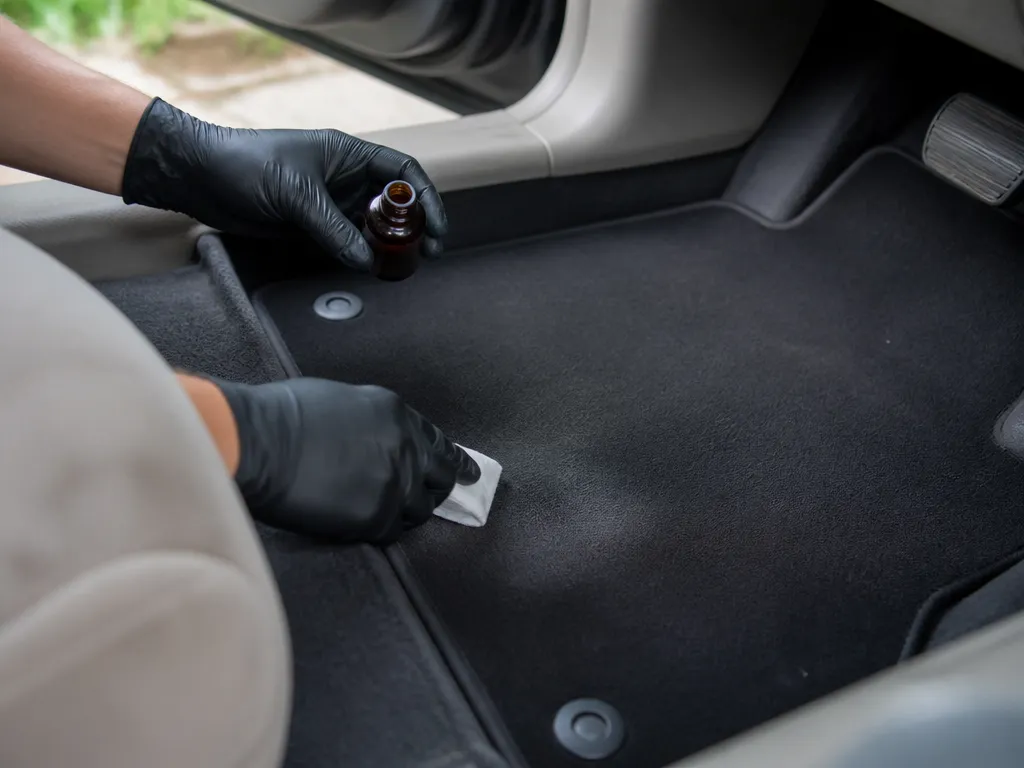
Spot testing prevents dye bleed, backing shrinkage, and “halo” lightening from cleaners. Carpet dye and fiber finishes vary a lot by make, year, and whether the carpet has been previously treated, so test before you commit.
Start with the areas most likely to hide a small change: under seats, the rear cargo edge (where the carpet turns up or meets the weather stripping), and a corner of the front kick panel. If your car has removable floor mats, pull them and test the carpet itself, since mats can be a different material and finish.
What you are looking for is simple and practical: dye transfer, lightening, and texture change. Dye transfer shows up as blue, gray, brown, or black residue on the white cloth, lightening looks like a lighter patch or ring, and texture change feels rougher or stiff compared to nearby fibers.
| Test result | What it means | What to do next |
|---|---|---|
| Dye rubs off onto white cloth | Carpet dye is bleeding or finish is weak | Stop that product, switch to a pH-neutral carpet cleaner, and retest in a new spot |
| Lighter patch or ring after drying | Cleaner is stripping dye or dispersing soil unevenly | Use a less aggressive formula and apply less moisture per pass |
| Fibers feel crunchy or matted | Over-wetting, residue, or binder damage | Rinse lightly with clean water on a cloth, then allow full dry before continuing |
Trade-off to remember: stronger cleaners clean faster, but they also lift more dye and residue. If the test spot changes color, it is usually safer to “go lighter” with dilution and shorter dwell time than to chase the stain with the same product.
When to stop and switch products is based on timing and severity. Stop immediately if you see heavy dye transfer on the first blot, and switch if lightening appears after it fully dries, even if it looks subtle.
Step-by-step Carpet Deep Clean Process
Carpet cleaning goes wrong when dirt gets ground deeper, detergent residue gets left behind, or the floor never dries. Follow a controlled sequence: clear access, vacuum hard, pretreat spots, agitate gently, extract, blot, then dry with airflow and time.
Mechanic tip: If the passenger floor stays damp longer than the driver side, check for runoff that pooled near the HVAC plenum or under-seat edges. Fixing that water path before you deepen the cleaning saves you from repeating the job.
Stain Treatments With Dwell Times
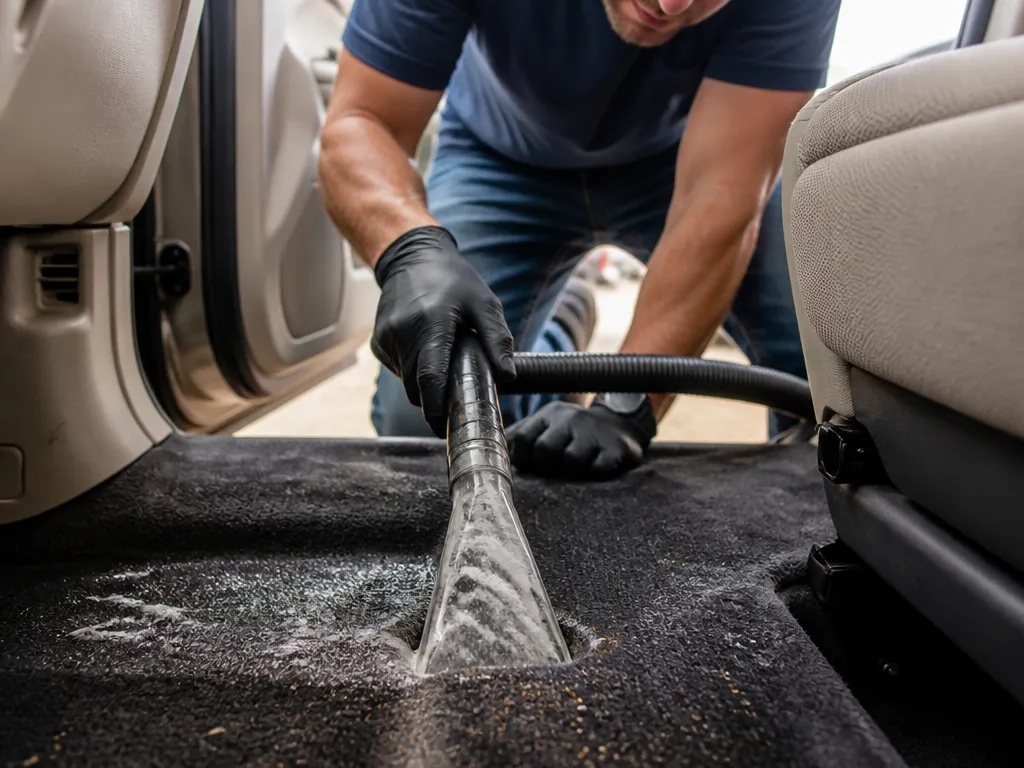
Different stains require defined dwell times to lift dye without oversaturating the carpet backing. The guide below sets practical ranges you can use at home, plus technique notes to keep color fastness intact and simplify extraction.
Mud and general ground-in dirt respond best when you prevent further dilution by pre-drying, then lift soil with a controlled pretreat and short dwell. After the dwell, extract thoroughly to keep the carpet fiber surface relatively dry and ready for a final pass.
Coffee tea and soft drinks leave sugars that can reattract dirt if left behind. Use a pH-balanced spot cleaner, keep the cleaner on the stain for a short dwell, then blot in cycles and rinse lightly if needed to remove stickiness.
Pet urine and biological odors rely on enzymes to break down proteins. Use an enzymatic cleaner, let it dwell long enough to reach the backing, and repeat as needed for heavy odor; then blot and extract to remove moisture and neutralize the scent.
Grease or oil spots require a degreaser spot method with a controlled dwell to prevent spreading. After the dwell, lift the residue with extraction and follow up with a rinse to remove any cleaner film.
Ink and marker stains demand caution and a patch test before any broad application. Use an alcohol-based cleaner only after confirming colorfastness, and keep dwell short with fast blotting to avoid spreading.
Wine and soda spills can lift dyes from certain carpets. Blot to remove liquid first, then apply a cleaner and use an extraction sequence with a dwell time of 5 to 15 minutes to lift color without over-wetting.
| Stain | Cleaner/Method | Dwell Time | Notes |
|---|---|---|---|
| Mud/ground-in dirt | Pre-dry, pretreat | 5 – 15 min | Avoid soaking; extract thoroughly |
| Coffee/tea/soft drinks | PH-balanced spot cleaner | 5 – 10 min | Rinse lightly if sticky |
| Pet urine/biological odors | Enzyme cleaner | 15 – 30 min | Repeat if odor persists |
| Grease/oil | Degreaser spot method | 5 – 10 min | Remove residue with extraction |
| Ink/marker | Alcohol spot test first | 1 – 3 min | Fast blotting only |
| Wine/soda | Cleaner + extraction | 5 – 15 min | Blot and lift dye |
Pro tip: always start with the least aggressive cleaner and shortest dwell time, then repeat only as needed. Over-wetting is the number one cause of resoil and mold in carpets.
Drying Plan After Extraction Clean
Carpet dries from the fibers down to the backing and padding, so your goal is to remove liquid fast without driving it deeper. Immediate blotting and airflow management prevent wicking into the foam padding, where it can stay damp for days.
| Condition | Typical Drying Window (Fibers to Padding) | What Changes the Time Most |
|---|---|---|
| Garage, HVAC off, fans only | 6 to 12 hours | Cabin humidity and how much water was extracted |
| Outside shade, light breeze | 10 to 24 hours | Ambient humidity and nighttime temperature drops |
| High humidity (rainy season) + strong airflow | 18 to 36 hours | Moisture load in padding, airflow direction consistency |
Dehumidifier use beats waiting. A dehumidifier removes moisture from the air so the carpet backing can dry even when the garage is damp.
In practice, running a small unit in the closed garage for a few hours can shorten drying by a large margin compared to air-only drying during humid weather. If you have a basement or a low-airflow garage, dehumidification is often the difference between “dry by morning” and “damp smell next week.”
Expert tip: If you can, keep doors closed once you set fans, then use airflow and dehumidification together. Open doors help initial circulation, but leaving gaps wide open in humid weather can keep reloading moisture into the cabin.
Odor Removal And Disinfectant Approach
Odors in car carpet almost always come from residue left behind, so treat the smell by removing the source first. After the organic material is gone, a deodorizer or disinfectant can finish the job without trapping the funk back into the fibers.
Source First, Then Deodorize
Urine, spilled food, mold, and sweat all leave behind proteins, salts, and bacteria that cleaning water alone cannot fully neutralize if they stay in the pad. Start by extracting as much liquid as possible, then clean the area thoroughly before you add any scent or germ-killing chemical.
For best results, focus on the backing too, not just the visible top pile, because many smells originate in the underpad.
For example, a “clean” looking spot can still stink if the backing stays damp or has dried residue.
Odor-neutralizer Vs Disinfectant (Practical Difference)
Odor-neutralizers cancel smell by changing how odor molecules interact with surfaces, while disinfectants kill microbes. A neutralizer can mask or reduce smell temporarily even when contamination remains, but it does not reliably fix a true biological source.
Disinfectant is the right tool when you suspect bacteria or mildew growth, but it can also leave a residue or stiffen fibers if you over-apply. Choose based on what caused the smell, then extract thoroughly so the carpet does not stay chemically loaded.
| Product type | What it does | When to use | Main risk |
|---|---|---|---|
| Odor-neutralizer | Targets odor chemistry | After residue removal | Smell returns if source remains |
| Disinfectant | Kills germs | After cleaning contamination | Residue, stiffness, discoloration |
| Enzyme cleaner | Breaks down organics | Urine, vomit, food, sweat | Needs dwell time and extraction |
Safer Application That Avoids Fiber Damage
Light misting is safer than soaking, because carpet backing saturates quickly and slows drying. Use a spray bottle or pump sprayer, apply enough to wet the fibers evenly, then let it dwell for the product’s stated time.
After dwell, extract or blot until you pull back clear water, then run fans to finish drying. Vent the cabin and keep airflow on the treated area, because trapped moisture reactivates odor even after disinfection.
Expert tip: If the carpet stays damp for more than a day in humid conditions, you are more likely to grow odor-producing microbes than you are to “cure” smell. Increase airflow and extraction first, chemicals second.
Ventilation And Re-entry Timing
Ventilate the car with doors open and fans running until the chemical odor dissipates and the carpet is dry. Re-entry time should follow the disinfectant label because dwell chemicals and carriers differ, but forcing occupancy while the carpet is still wet is a fast way to reintroduce smell.
If you smell strong chemical scent after extraction, add ventilation and give it more drying time instead of adding more product. Persistent strong odor also suggests over-application or incomplete extraction, which can leave residues in the underpad.
Leather-adjacent Caution
Leather seats, leather-wrapped consoles, and stitched seams get ruined by runoff and overspray. Disinfectants can dry leather and damage edge coatings, and they can wick into stitching where cleanup is tough.
For cars with tight interior trim (common on many Audi, BMW, Mercedes-Benz, and higher-trim SUVs), leave extra buffer around seat rails and foam borders, because product can creep under trim and keep re-spreading odor as it dries.
Maintenance To Prevent Re-soiling
Vacuuming is the highest-return habit for keeping car carpet clean, because dirt drives like sandpaper and keeps wicking stains back to the surface. A consistent routine prevents buildup in high-traffic spots like seat tracks, edges, and under floor mats, where grime hides and then reappears after you clean.
Vacuum Schedule And Technique
Vacuum the interior on a timer: every week for regular use, and after bad weather or muddy trips. Spend extra time where fibers trap grit, since grit breaks down carpet backing and makes odors stick.
For example, in a Honda Civic, Toyota Camry, Ford F-150, or Subaru Outback, the front passenger area usually gets the most residue from shoes and dropped debris. That is also where you will notice carpet “re-soiling” first, even if the rest of the floor looks fine.
| Area | What you miss if you rush | Time to hit with vacuum |
|---|---|---|
| Under mats | Fine sand and road film that rebuild stains | 30 to 60 sec per side |
| Seat tracks | Grain that grinds fibers when seats slide | 15 to 30 sec per rail |
| Perimeter edges | Moisture and dirt migration | 20 to 40 sec per row |
Mats And Color-safe Habits For Daily Messes
Quality all-weather floor mats reduce carpet exposure more than any cleaner because they physically intercept moisture and grit. Rinse or brush mats weekly if you live where road salt is common, since salt crystals can grind carpet fibers even when you think the mat is doing the job.
Quick-spill Protocol: Blot, Lift, Rinse-lightly, Dry
Quick spills are won or lost in the first few minutes. Follow a simple order: blot to lift, lift residue with a damp microfiber, then rinse lightly only if the spot cleaner requires it, and dry fast to stop wicking.
For instance, coffee, soda, and sports drinks will often leave a sticky ring if you rush straight to heavy soaking. The sticky residue re-attracts dust, which is why the stain “comes back” days later even when it looked clean that night.
Periodic Deep Clean Timing And Pre-conditioning
Plan a deeper clean every 3 to 6 months depending on traffic, pets, and weather exposure. Deep cleaning too often can overdampen fibers, which leads to lingering smell, so stick to a schedule you can maintain and dry thoroughly.
Insider tip: Pre-treat oily spots (like tracked-in food) with a carpet-safe cleaner appropriate for fabric, then extract or blot until the towel stays mostly clean before any general cleaning. That prevents “ghost stains” caused by spreading oil outward.
Before any session, check for hidden buildup under seat edges and along trim. Pre-conditioning works best when it is applied lightly and allowed to dwell for the time stated on the product label, because excess wet cleaner creates residue that attracts dirt.
Troubleshooting Residue, Unchanged Stains, And Musty Odor
Residue left behind usually shows up as a stiff, shiny, or dirty-looking patch that grabs dust. Residue is commonly from overusing cleaner, not extracting enough, or skipping the correct rinse step when the product calls for it.
For example, many musty smells come back after a “surface clean” because the carpet dries on top but the pad stays damp underneath. If the odor persists after thorough drying, lifting the edges to improve airflow or repeating extraction on that area is often the difference between a quick fix and a permanent clean.
Quick Summary
Start by lifting the floor mats and vacuuming loose grit, then you can see stains more clearly without grinding dirt into the backing. The article stresses patch-testing first, including near dyed carpet edges and any leather-adjacent areas, because carpet dye can bleed, fade, or streak with strong cleaners or high-heat water. Color testing involves applying cleaner to an out-of-sight spot, waiting 10 minutes, letting it dry, and checking for color transfer onto a white towel before you proceed.
For cleaning, vacuum thoroughly for 2 to 5 minutes per seat area, pretreat stains, let the cleaner dwell for 5 to 15 minutes, then agitate lightly with a soft brush using about 10 to 20 strokes so you loosen soil without fuzzing fibers. Extract with short passes, then blot with clean towels until minimal color transfers, rinsing only if the product directs it. Dry fast for 6 to 24 hours with airflow, using a dehumidifier if it stays damp, so you avoid musty odor, mildew, and rust from trapped moisture.
| Stage | What to do | Key time or detail |
|---|---|---|
| Test | Patch-test cleaner in a hidden spot, then check dried color transfer | Wait 10 minutes for initial test, verify after it dries |
| Vacuum | Lift mats first, then vacuum loose dirt before any liquids | 2 to 5 minutes per seat area |
| Clean | Pretreat, dwell, agitate gently, and extract with short passes | Dwell 5 to 15 minutes, brush 10 to 20 strokes |
| Dry | Blot, then dry with airflow until fully dry | 6 to 24 hours, use dehumidifier if still damp |
Frequently Asked Questions
What Is The Best Order To Clean Car Carpet To Remove Dirt And Stains?
Start with a thorough vacuum to remove loose debris, then pretreat stains with an enzymatic or soil-specific cleaner, let it dwell for 5-10 minutes, scrub with a stiff brush, and finally extract with a wet-dry vacuum or blot with towels until moisture is gone. A solid vacuum first is the most important step.
Do I Need A Steam Cleaner To Clean Car Carpet, Or Can I Do It With Basic Supplies?
You can clean car carpet effectively with basic supplies like a bottle of carpet cleaner, a stiff brush, and a wet-dry vacuum. Steam cleaning is optional for deep stains, not a requirement for decent results.
How Long Does It Take For Car Carpet To Dry After Cleaning?
Drying times vary with climate and ventilation, but plan on roughly 4 to 12 hours for the carpet to fully dry. Open doors or run a fan to speed drying and avoid walking on the area until it is dry.
What Cleaners Are Best For Car Carpet And Can I Use Household Products?
Use an automotive carpet cleaner or enzymatic stain remover for organic stains, and test any cleaner in a hidden area first. Avoid bleach or strong ammonia on colored fibers to prevent discoloration.
What Are Common Mistakes That Ruin Car Carpet During Cleaning?
Common mistakes include over-wetting the carpet, scrubbing too harshly, and not drying completely, which can lead to mold and odors. Always vacuum first and ensure the area dries fully before driving.